Temperature: The Most Reliable Path to Juicy, Safe, Crowd-Pleasing Meat
Perfect meat isn’t an accident—it’s temperature control. Time, look, and feel can help, but internal temperature is the only consistent way to hit safe doneness and mouthwatering texture. This comprehensive DDR BBQ Supply guide blends USDA food-safety minimums with proven BBQ finish temperatures so you know when to pull steaks, roasts, chicken, pork shoulder, ribs, salmon, lamb, and more. You’ll learn probe placement, resting and carryover cooking, and how cooker management, weather, and meat thickness affect your readings—plus the simple tools from our Thermometer Collection that make accuracy easy every cook.
 Why Internal Temperature Matters
Internal temperature is objective. It reflects what’s happening inside the meat—protein denaturation, fat rendering, and collagen conversion—not just the surface appearance. Two steaks can look identical on the outside yet be 10°F apart inside due to marbling, thickness, or grill hot spots. The same applies to briskets and pork shoulders; both need time at higher internal temperatures to dissolve connective tissue into gelatin for that luscious bite. When you cook to temperature, you remove guesswork and repeat success—whether you’re grilling on a weeknight or smoking for a weekend party.
Temperature also ensures food safety. Harmful bacteria die at specific temperatures and exposure times. While the USDA provides clear minimum internal temperatures to make food safe, BBQ finish temps often exceed those minimums for texture (think brisket at ~203°F). Knowing both numbers lets you serve meat that’s safe, juicy, and tender every time.
USDA Safety vs. BBQ Finish Temperatures
USDA safety minimums are the temperatures that eliminate harmful pathogens. These are non-negotiable for ground meats and poultry. BBQ finish temperatures are higher targets used by cooks to achieve the texture they want. For tough cuts with lots of collagen—brisket, chuck roasts, pork shoulder, and ribs—reaching ~190–205°F allows connective tissue to break down for a silky mouthfeel. For tender cuts like steak or pork loin, the “finish” is often below or just at the USDA minimum, with carryover cooking completing the job.
In this guide, each protein includes both perspectives so you can choose based on your goal: purely safe minimums for quick cooks, or flavor/texture finish points for BBQ and steakhouse-style results.
How to Temp Meat (Probe Placement, Angles & Multiple Checks)
Getting temperature right starts with measuring correctly. A calibrated thermometer from our Thermometer Collection is step one. Step two is probe placement:
- Find the thickest point. Insert the probe into the center of the thickest portion. Avoid bones, fatty pockets, and gristle—these can read too hot or too cool.
- Mind the angle. For thin items (burgers, cutlets, salmon portions), go sideways into the center rather than top-down to avoid reading the pan or grill marks.
- Check multiple spots. Large roasts and whole birds cook unevenly. Verify breast and thigh on poultry; flat and point on brisket; several spots on pork shoulder.
- Watch the climb. If the temperature is still rising quickly, you’re in an active heat zone—wait a few seconds for stabilization before deciding to pull.
- Don’t pierce repeatedly in the same place. Minimize juice loss by using a thin probe and limiting punctures.
Pro Tip: Map your readings. On big cuts, note hot and cool zones so you can rotate or shield parts to even out the cook.
Carryover Cooking & Resting: Timing Your Pull
Carryover cooking is the temperature rise that happens after meat leaves the heat source. The hotter and larger the item, the more residual heat travels inward. Steaks and chops typically rise 3–5°F; roasts and whole birds can climb 5–10°F. If you want a medium-rare steak at 130–135°F, pull at ~125–130°F and let it rest. For pork loin targeting 145°F, you might pull at ~140°F, tent loosely with foil, and the final temperature will settle right where you want it.
Resting also lets juices redistribute. Cutting immediately lets moisture spill out; waiting keeps it in the meat. For steaks, 5–10 minutes is fine. For brisket and pork shoulder, resting 30–60 minutes (or longer, safely held in an insulated cooler) transforms the slice or shred.
 Cooker Factors: Heat Zones, Weather & Consistency
Internal temperature is shaped by your cooker’s behavior. A few variables matter every time:
- Heat zones: Gas grills, charcoal beds, ceramic cookers, and pellet grills create natural hot and cool spots. Learn your grate map with a toast test or by watching how quickly thin items brown.
- Ambient conditions: Wind and cold sap heat. If you’re cooking in winter, use a grill cover or windbreak and give your cooker extra time to recover after opening the lid.
- Lid management: “If you’re lookin’, you’re not cookin’.” Each peek dumps heat and smoke. Rely on a leave-in probe for large cuts to minimize opening the lid.
- Fuel consistency: Uneven charcoal piles and pellet runs can create temperature swings. Set a steady base and refill before you’re low.
- Moisture management: Water pans, spritzing, and drip pans impact surface temperature and bark formation, influencing how fast the center climbs.
Consistency outside leads to consistency inside. Stabilize your cooker first; then the internal temperatures you target will be repeatable.
Beef Temperatures (Steaks, Burgers & Roasts)
Beef offers the widest range of doneness preferences. Tender cuts (ribeye, strip, tenderloin) shine from rare to medium; tougher cuts (chuck, round) benefit from either low finish temps for slicing or high finish temps for shredding.
Steaks: Pull Points for Restaurant-Quality Results
USDA minimum (intact whole muscle): 145°F with a 3-minute rest. Many steak lovers prefer lower pull temps for tenderness and juiciness, relying on surface searing to address surface bacteria.
- Rare: Pull at 120–122°F; final ~125°F (cool red center, very tender).
- Medium-Rare: Pull at 125–130°F; final ~130–135°F (warm red center, classic steakhouse target).
- Medium: Pull at 135–140°F; final ~140–145°F (pink center, a bit firmer).
- Medium-Well: Pull at 145–150°F; final ~150–155°F (slight blush, drier).
- Well-Done: Pull 160°F+ (brown throughout; consider saucing or butter basting).
Technique: For thick steaks (1.25–2 inches), reverse-sear is foolproof: cook indirect to ~10°F below your target, then sear hot for a crust without overshooting the inside.
Burgers: Safety First
USDA minimum (ground beef): 160°F. Grinding mixes surface bacteria throughout, so burgers should be cooked through. If you want juiciness at 160°F, choose higher-fat blends, avoid smashing late in the cook, and toast buns to protect moisture. Use an instant-read thermometer and insert from the side into the center for accuracy.
Roasts: Sliced vs. Shredded
Beef roasts are two categories:
- Slicing roasts (prime rib, strip loin, tri-tip): Pull at 120–128°F for rare to medium-rare; rest to 125–135°F. For a rosy slice, this is the sweet spot.
- Braising/BBQ roasts (chuck roast): For shreddable texture, plan for 200–205°F, but rely on the probe feel—it should slide in with little resistance.
Brisket: Tender, Not Just “Safe”
Brisket is safe long before it’s tender. The target most cooks love is 200–205°F in the thickest areas, but feel rules all. When your thermometer meets almost no resistance in the flat and the point, you’re there. Expect a long rest—at least 1 hour; 2–4 hours insulated is even better. Slice the flat against the grain; cube or slice the point as desired. If slices crumble, it’s overcooked; if they resist a gentle tug, it needed a little longer.
Pork Temperatures (Chops, Loin, Ribs & Pulled Pork)
Pork has changed—modern guidelines allow for juicier pink interiors.
Chops & Loin: Juicy and Tender
USDA minimum: 145°F with a 3-minute rest. For the best bite, pull at 140–145°F depending on thickness and let carryover finish. Brining or dry brining helps retain moisture. Roast or grill over moderate heat to avoid a dry, gray band under the crust.
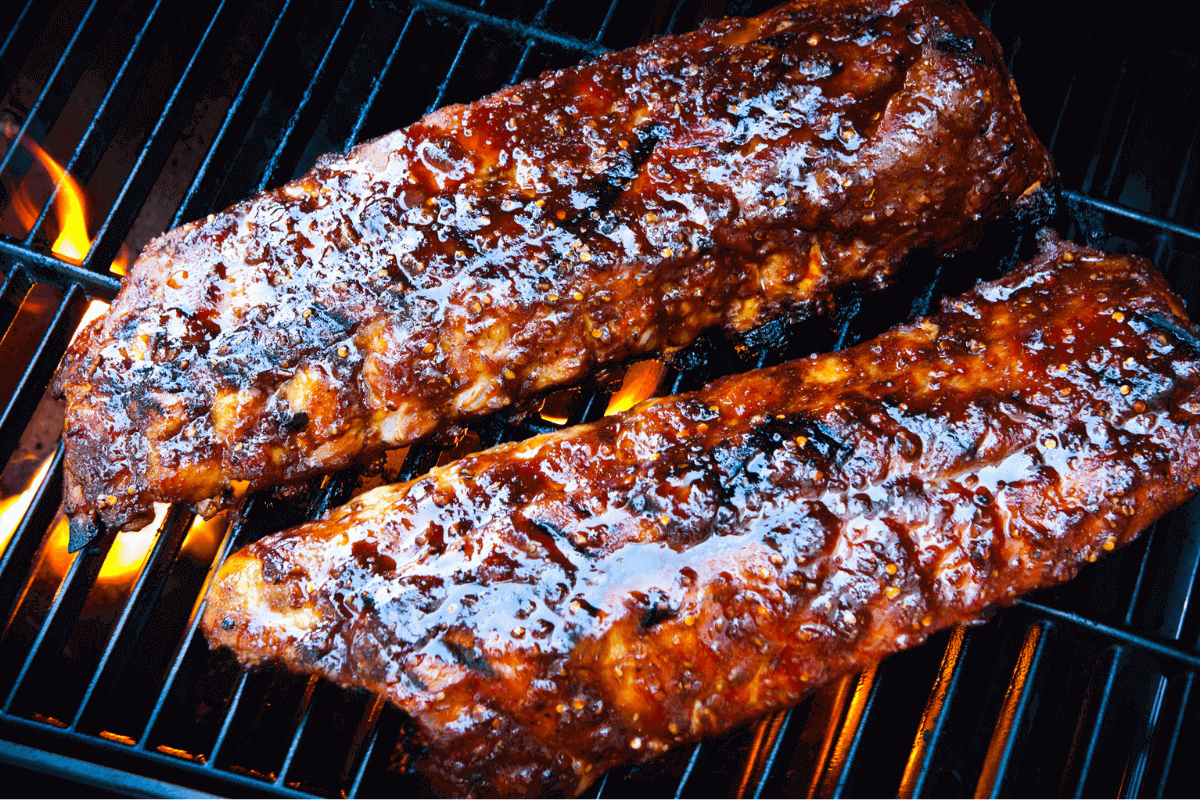
Ribs: The Bite Test
Ribs are safe at 145°F, but still tight. For bite-through tenderness, aim for an internal of 190–203°F and perform the bend test: pick up the rack with tongs at the middle—if it bows and the surface starts to crack lightly, you’re close. Another cue is meat pullback from the bone ends. Different rib styles (baby backs vs. spares/St. Louis) finish similarly but may take different times.
Pork Shoulder (Pulled Pork): Collagen Conversion
For shreddable pork, shoot for 195–205°F, but use the probe test in multiple spots; butts can have pockets that finish later. Rest at least 30–60 minutes before pulling. Mix bark pieces throughout for texture and flavor. If it’s stubborn at 190°F, hold it there until connective tissue finally yields.
Poultry Temperatures (Chicken & Turkey)
Poultry requires full doneness for safety. The challenge is achieving that without drying out lean breast meat.
Chicken Breast: Timing the Carryover
USDA minimum: 165°F. For juicier results, many cooks pull breasts at 160°F and let carryover bring them to 165°F while resting. A quick brine or dry brine, a moderate grill temperature, and a finishing glaze keep fibers from tightening too quickly.
Thighs & Drumsticks: Higher is Better
Dark meat shines when cooked hotter. While 165°F is safe, cooking to 175–185°F dissolves connective tissue and yields tender, flavorful bites. It’s the reason smoked leg quarters taste so good when you take them a bit further.
Turkey: Breast vs. Thighs
For a whole bird, your targets are split: 165°F in the breast and 175°F+ in the thighs. Spatchcocking helps both finish closer together. If you cook the bird whole, place one probe in the deepest breast and another in the inner thigh. Pull the bird when the breast hits 160–163°F, tent, and let carryover bring it to 165°F; thighs will typically land in a better, more tender range by then.
 Lamb Temperatures (Chops & Roasts)
Lamb is superb from medium-rare to medium. Overcooking dries it fast; undercooking emphasizes minerality that not everyone loves. Season boldly and mind your pull points.
- Chops & Rack: Pull at 125–130°F for medium-rare; rest to ~130–135°F. For medium, pull at 135–140°F; rest to 140–145°F.
- Leg of Lamb (roast): Pull at 130–138°F depending on desired doneness; rest to 135–145°F.
- Ground lamb: USDA 160°F for safety.
Reverse-sear or a two-zone grill setup helps achieve even color edge-to-edge with a great crust.
Seafood Temperatures (Salmon, White Fish & Shellfish)
Seafood finishes fast and suffers if overcooked. Gentle heat and precise temps keep it delicate.
- Salmon: Pull at 120–125°F for silky, moist flakes; rest to ~125–130°F. For firmer salmon, pull at 128–130°F; rest to ~130–135°F.
- White Fish (cod, halibut, snapper): Pull at 130–140°F depending on thickness; rest briefly. Look for opaque flesh that still glistens.
- Shrimp & Lobster: Around 120–130°F until just opaque and firm. Overcooked shellfish goes rubbery quickly—watch closely.
- Scallops: For pan-seared, aim for 115–120°F center after a strong surface sear; they’ll finish as they rest on the plate.
Lean Wild Meats (Venison, Elk & Bison)
Lean, pasture-fed muscles have less intramuscular fat to buffer heat, so precision is crucial. Treat them like very lean beef steaks.
- Venison backstrap/steaks: Pull at 120–125°F; rest to ~125–130°F for rare to medium-rare. Anything past 135°F dries quickly.
- Elk & Bison steaks: Pull at 125–130°F; rest to ~130–135°F. High heat sear with a short cook maintains tenderness.
- Ground wild meats: USDA 160°F for safety. Add fat or moisture-rich binders to protect texture.
Thermometer Calibration & Accuracy Tips
If your thermometer reads 8–10°F off, every decision down the line suffers. Calibrate regularly:
- Ice bath test: Stir ice water until slushy. Insert the probe without touching the container. It should read ~32°F (0°C). Adjust if your model allows; otherwise note the offset.
- Boiling water test: Water boils at ~212°F at sea level (about 2°F less for every 1,000 feet elevation). Verify your reading and note any difference.
- Check response time: Move from ice to hot water and watch how quickly the display stabilizes. Slow response makes you chase temps and overshoot.
- Protect the probe: Don’t jam it into bone or bend the cable at sharp angles. Clean with warm soapy water and dry thoroughly.
Accurate tools and technique compound—great temps become predictable, week after week.
Simple Gear That Improves Temperature Control
You don’t need a lab to cook precisely. A few staples from DDR BBQ Supply make a huge difference:
- Instant-read and leave-in probe thermometers for fast checks and long smokes.
- Quality grills and smokers with stable heat output for consistent results.
- Rubs and sauces to pair with your perfect finish temperatures.
Using the right tools shortens the learning curve and keeps your focus on flavor instead of firefighting.
Best Practices That Deliver Better Temperatures
Lock in these habits to make perfect temps repeatable:
- Dry brine early. Salt 2–24 hours ahead. Better moisture retention means better tolerance if you’re a couple of degrees off.
- Control your sear. For thick cuts, separate the color-building sear from the internal finishing with reverse-sear. You’ll nail temperature without burning the outside.
- Use two zones. Keep a hot side and a cool side. Move food as needed to avoid flare-ups and steam traps.
- Open the lid less. Every peek costs heat and time. Trust your probes.
- Rotate and reposition. Even cookers have quirks. Small adjustments keep internals even across the meat.
- Rest properly. Give small cuts 5–10 minutes; give big cuts 30–60+ minutes, loosely tented. Don’t steam the crust—leave vents.
 Troubleshooting Temperature Problems
When things go sideways, use temps to recover:
- Overshot your steak temp? Slice and baste with warm butter or jus. Next time, pull earlier and trust carryover.
- Dry chicken breast? Brine next time and track temps closely. Cook at moderate heat and glaze late to protect the surface.
- Pork shoulder stalled? Wrap in butcher paper or foil around 160–170°F to power through, then unwrap to set bark if needed.
- Brisket slices crumbly? Overcooked. Shorten the cook or lower the pit temp next time; rest in a cooler to stabilize before slicing.
- Burgers undercooked in the center? Insert the probe sideways. Cook to 160°F and hold for a moment to verify.
Cook with Confidence Using DDR BBQ Supply
Nailing the perfect internal temperature turns cooks into crowd-favorites. If you’re ready to make precision easy, visit our Thermometer Collection and explore steady-heat grills and smokers. Pair your perfectly cooked meat with proven rubs and sauces, and you’ll serve plates people remember.
Meat Temperature FAQs
Do I really need a thermometer?
Yes. Color, juice color, and texture cues vary by cut and cooking method. A quality thermometer gives you repeatable accuracy, especially with thicker cuts and whole birds.
What’s the difference between safe and ideal temperatures?
Safe temperatures (USDA minimums) eliminate harmful pathogens. Ideal BBQ temperatures aim for a specific texture—like ribs that bite cleanly or brisket that’s tender enough to droop—but they always include the safe minimum along the way.
How do I avoid overcooking by a few degrees?
Pull early and use carryover. For steaks, pull 3–5°F under target; for roasts and whole birds, 5–10°F under. Rest properly to settle juices and temperature.
Why do ground meats have higher required temps?
Grinding mixes surface bacteria throughout the meat, so burgers, meatballs, and sausage need to reach 160°F for safety. Use a side-entry probe for thin patties.
How many spots should I check on a brisket or turkey?
At least two in the thickest areas: flat and point on brisket, breast and thigh on turkey. If one area lags behind, rotate, shield, or hold until it matches.
Can I trust the built-in lid thermometer on my grill?
It only shows ambient air at the dome, not meat temperature. Use a reliable instant-read or a leave-in probe placed at grate level near the food.
What if my thermometer seems off?
Calibrate with an ice bath (32°F) and boiling water (~212°F at sea level). If your unit can’t be adjusted, note the offset and compensate when you cook.


